HiTorque 7×16 Mini Lathe · Volume 3
Tooling & Accessories — Workholding, Cutting Tools, and the Tailstock End
3.1 The machine is only half the tool
A bare lathe cannot make a single part. What it does is spin an axis and move a tool in a plane; everything that grips the work, holds the cutter, and supports the far end is tooling, and the range and quality of that tooling determines what the machine can actually do far more than any spec on the machine itself. A well-tooled 7×16 is a versatile little shop; a bare one is a paperweight. This volume covers the workholding at the spindle end (chucks, faceplate, centers), the tool holding at the carriage (tool posts and the cutting tools themselves, and the crucial matter of tool height), and the tooling that goes into the tailstock. Where the machine ships with an item, that is noted; the rest are the accessories a maker adds over time.
3.2 Chucks: the three-jaw and the four-jaw
The chuck is the rotating clamp that grips the work on the spindle nose, and it is the accessory the operator touches most. Two kinds do most of the work, and they are complementary rather than competing.
The machine ships with a 4-inch (100 mm) three-jaw self-centering chuck (a Sanou-brand unit). A three-jaw self-centering chuck moves all three jaws together by a single scroll, so a round or hexagonal workpiece is automatically centered when the jaws close — one turn of the chuck key with the supplied key and the part is gripped and running roughly true. That speed is the three-jaw’s whole virtue: for the enormous majority of turning, where a piece of round bar simply needs to be held on its own axis, it is the right tool and the fast tool. Its limitations are that it grips only round and hexagonal stock well, and that it re-centers to its own scroll rather than to the part — so a part removed and re-chucked will not run exactly where it did before, and the chuck’s own accuracy (typically a few thousandths of runout on these machines) is baked in.
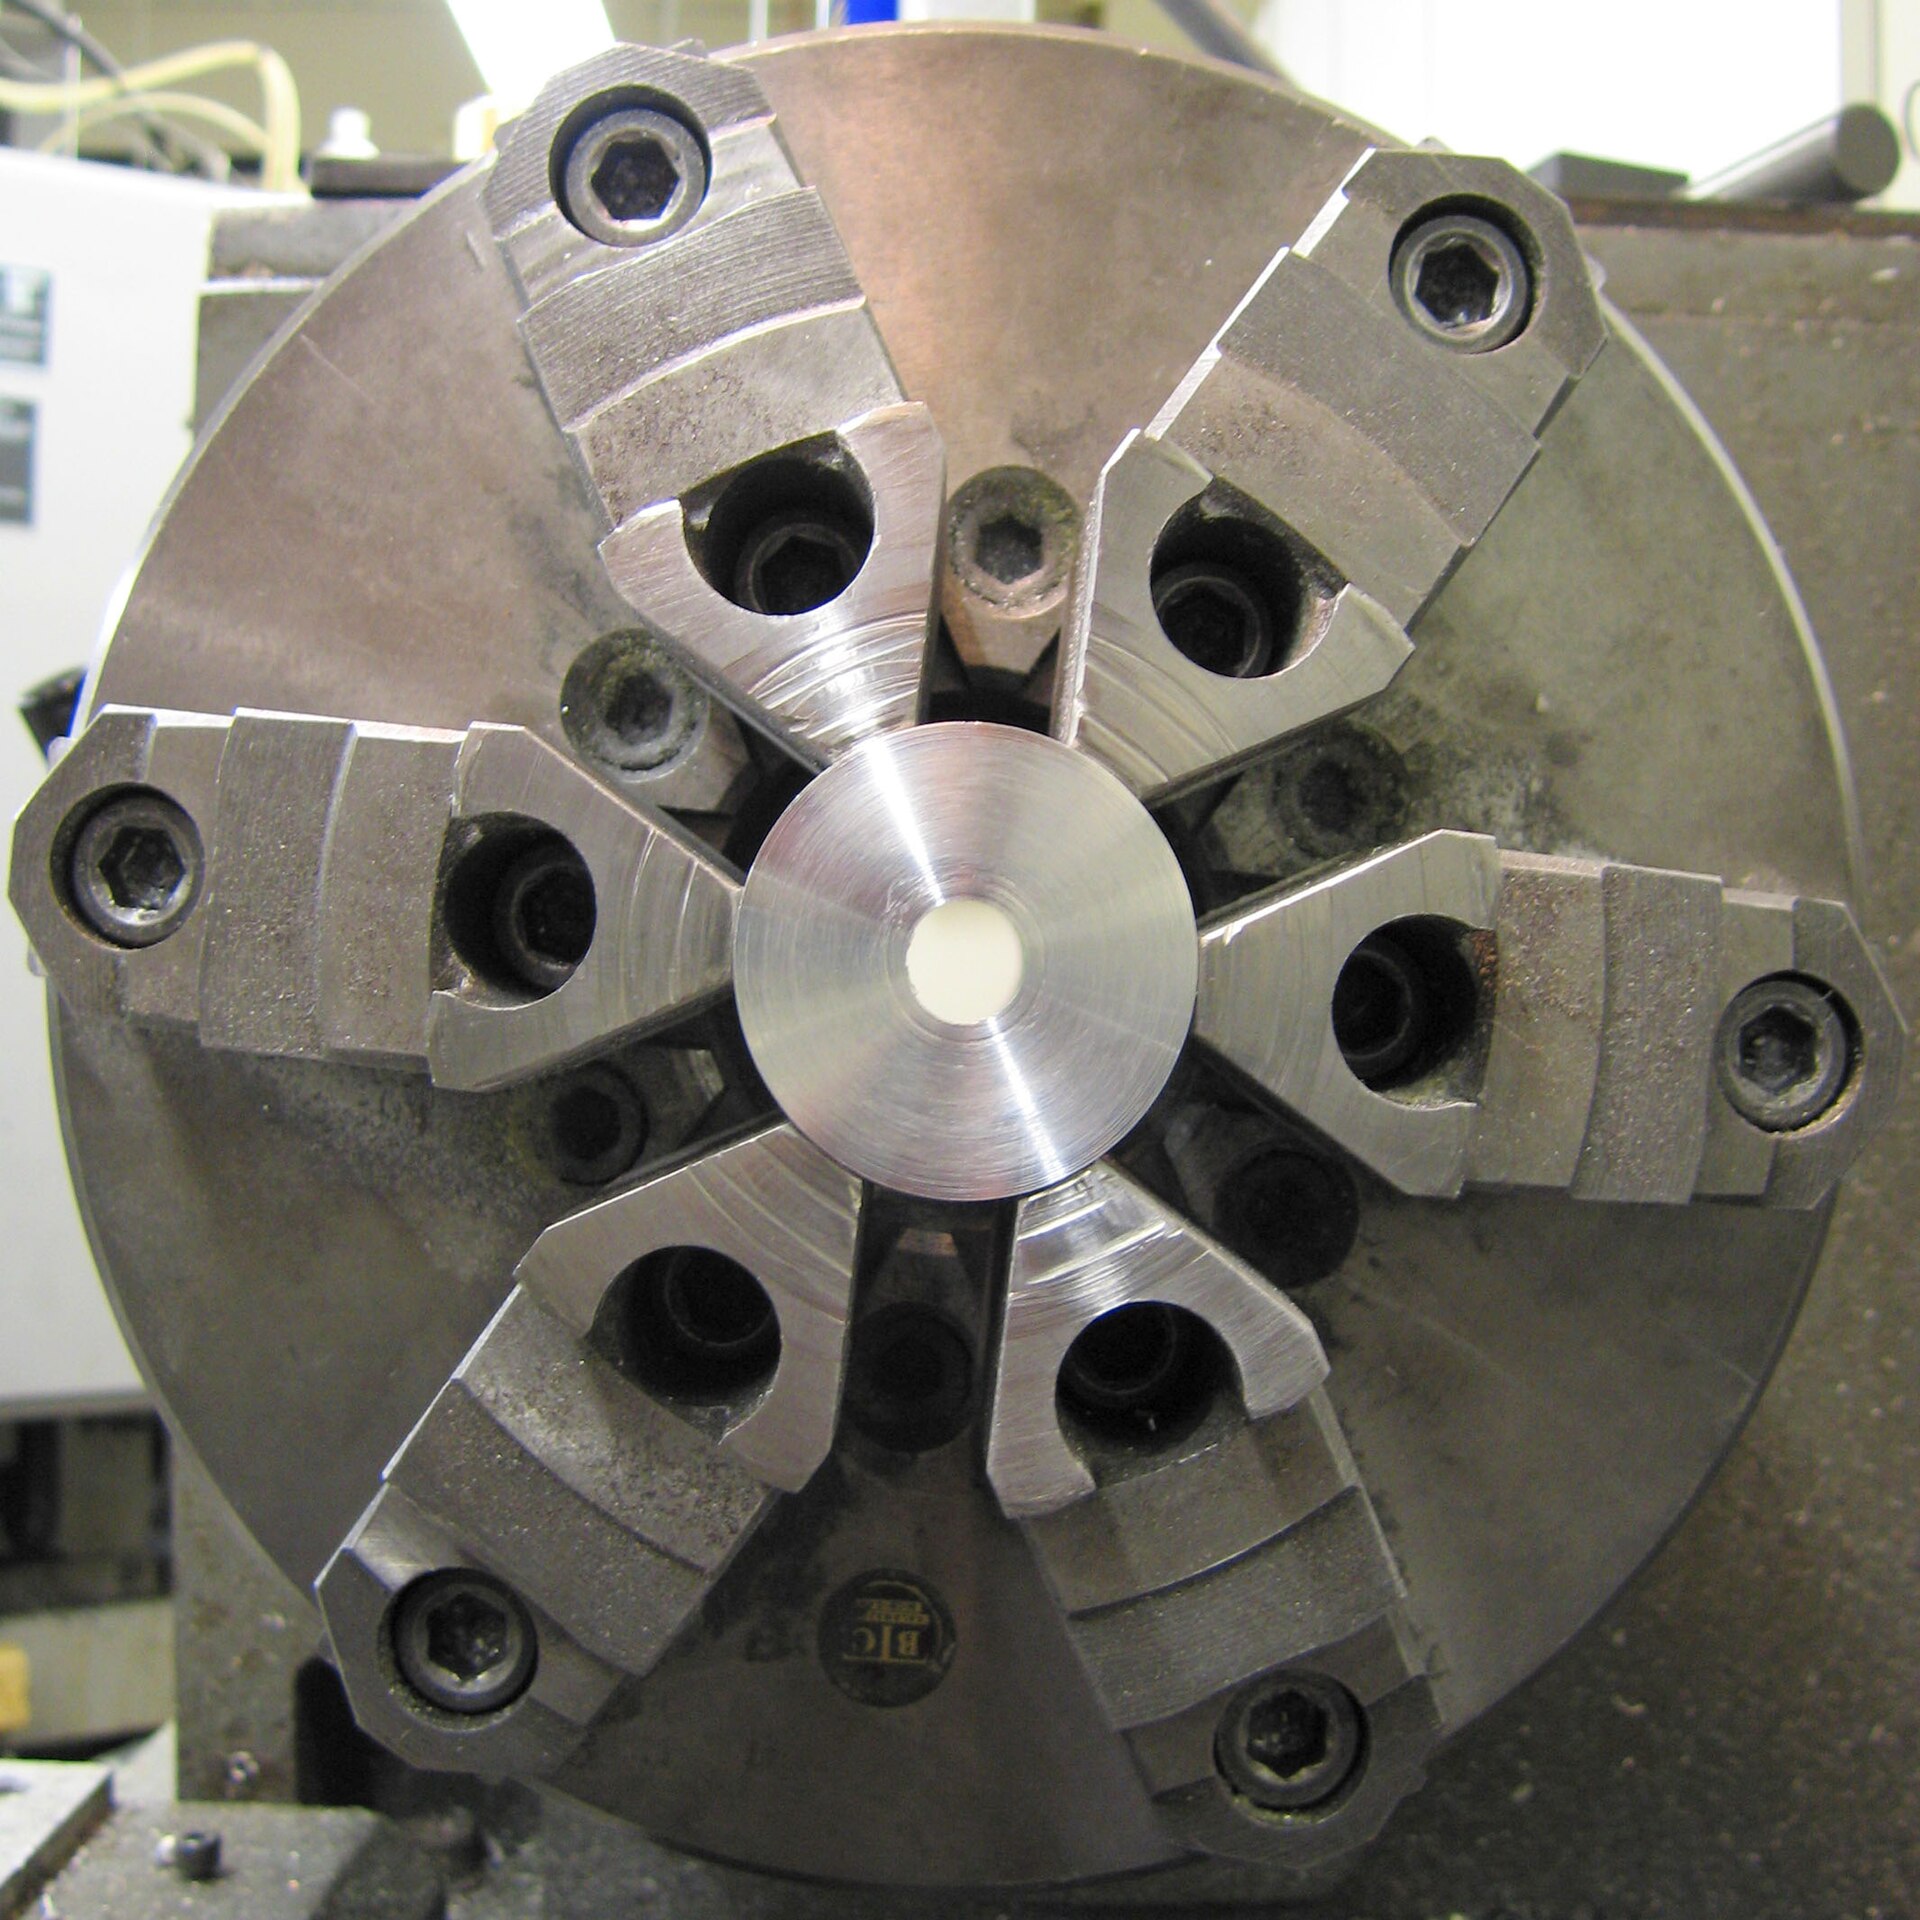
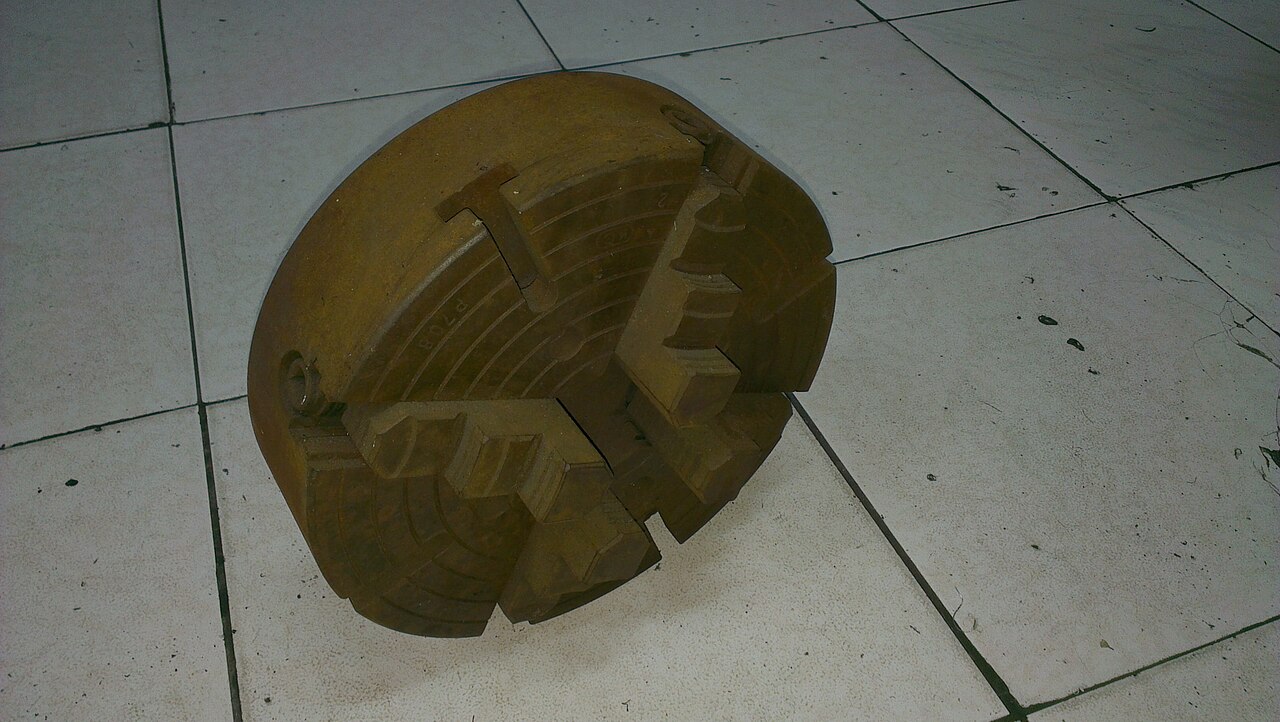
The four-jaw independent chuck solves the three-jaw’s limits at the cost of speed. Each of its four jaws is adjusted independently by its own screw, so the chuck can hold square, rectangular, and irregular work as well as round, and — most valuably — it can be dialed in to run a part dead true, or deliberately off-center for eccentric work. The operator indicates the work with a dial test indicator and nudges opposing jaws until runout is driven to near zero. It is slower to set up than a three-jaw, but it is the accuracy tool: when a part must run truer than the three-jaw’s scroll allows, or must be re-chucked concentric to an existing feature, the four-jaw is how it is done. A four-jaw sized for the machine is one of the first accessories worth adding.
3.3 The faceplate
For work that no chuck will grip conveniently — flat, awkward, or offset parts — the faceplate is the oldest answer. It is a flat disc that threads onto the spindle nose, drilled and slotted so the workpiece can be bolted or clamped directly to its face. A part held on a faceplate can be positioned and shimmed exactly where it needs to run and then faced, bored, or turned. It comes into its own for parts with an off-axis bore, for thin or oddly-shaped pieces, and for work held against an angle plate for boring at a set location. It is not an everyday accessory, but for the occasional part that defeats the chucks it is indispensable.
3.4 Centers: live and dead
When a workpiece is long enough that the spindle cannot support it alone, its far end is carried by a center in the tailstock, seated in a small 60-degree conical hole drilled in the end of the work. There are two kinds, and the distinction matters.
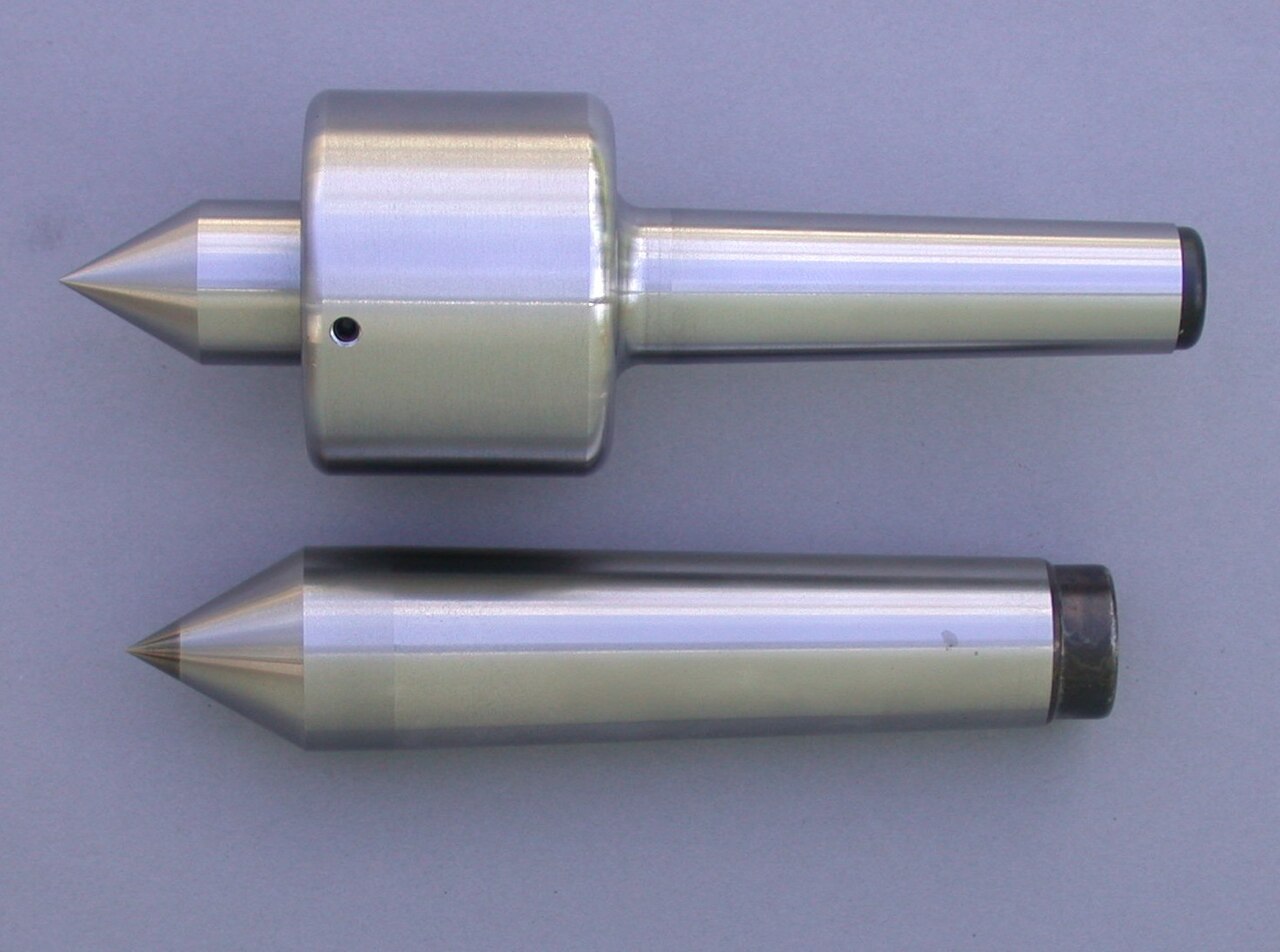
A dead center is a solid, hardened cone that does not rotate; the work spins on it, so the contact point must be lubricated and will generate heat and wear at high speed. Its virtue is rigidity and accuracy — nothing to introduce runout — and it is the traditional choice for precise work and for the headstock end. The machine ships with an MT2 dead center for the tailstock.
A live center carries its cone on its own bearings, so the point rotates with the work. It needs no lubrication at the contact, tolerates high speed without burning, and is the practical everyday choice for supporting the tailstock end of most work. A live center for the MT2 tailstock is a standard early addition, and between it and the supplied dead center the machine can support long work in both the fast, forgiving way and the precise way.
3.5 Tool posts, and the quick-change upgrade
At the top of the compound rest sits the tool post, which clamps the cutting tool at the correct height and angle. The cheapest machines use a simple four-way or clamp-type post in which the tool is shimmed to center height with stacked strips of steel — workable, but slow and fiddly, because every tool change means re-shimming and re-checking height.
The universally-recommended upgrade, and the one this Deluxe 7450 ships with, is a quick-change tool post (QCTP) — specifically an 0XA wedge-type unit with five tool holders. Each cutting tool lives in its own holder, whose height is set once with a knurled adjuster and then locked. To change tools, the operator lifts the holder off the post’s dovetail and drops on another; a lever wedges it tight, and the new tool returns to exactly the height it was set to, every time, in a couple of seconds. For one-off work, where a single part may need a turning tool, a facing tool, a parting blade, and a boring bar in quick succession, the QCTP is transformative: it removes the single most tedious and error-prone step of tool changing, and it is the reason the machine can be tooled up with a shelf of pre-set holders ready to swap. The 7450’s post accepts turning tools up to a 1/2-inch shank.
3.6 Cutting tools: turning, facing, parting, boring, threading
The tools that actually cut fall into a handful of families, and a basic set covers most work.
Turning and facing tools are the workhorses: a right-hand turning tool cuts along the work reducing its diameter, a left-hand tool works the other way, and a facing tool squares the end. On a small lathe these are commonly either ground high-speed-steel (HSS) tool bits — cheap, easily reground to any shape, and forgiving — or indexable carbide-insert tools, which hold an edge far longer in steel and need no grinding but cost more and like higher speeds and rigidity. Many makers keep both: HSS for fine finishing and odd forms they grind themselves, carbide for production and tougher materials.
Parting tools (cut-off tools) carry a thin, deep blade that plunges straight in to sever a finished part from the bar. Parting is the operation that most tests a small lathe’s rigidity and the operator’s tool height, because the narrow blade is buried in the cut with little room to escape chips; a rigid QCTP, a tool exactly on center, and the machine’s low-end torque all matter here.
Boring bars enlarge and finish an existing hole from the inside, reaching into a bore drilled by the tailstock and cutting outward to a precise internal diameter — the only way to make an accurate, concentric bore larger than a drill or of a non-standard size.
Threading tools carry a 60-degree (for imperial/metric V-threads) or other profile point ground to the thread form, and cut a thread’s helix as the lead screw drives the carriage in step with the spindle. Internal threading tools are essentially small boring bars with a threading point. Threading technique and setup are covered in the operations volume; here it is enough to note that thread cutting needs its own correctly-ground and correctly-set tool.
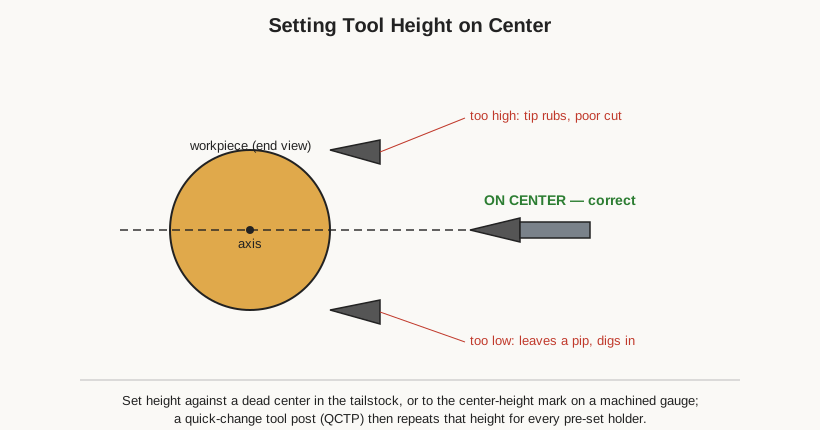
The one discipline that ties all of these together is tool height. Every cutting tool must have its cutting edge set exactly on the spindle centerline. A tool set too high rubs its heel and cuts poorly; a tool set too low leaves an un-cut “pip” at the center when facing and tends to dig in and dive under the work. On a shimmed post this is set by trial with stacked shims; on the machine’s quick-change post it is set once per holder and thereafter automatic — which is precisely why the QCTP is worth its cost.
A brief word on the two tool materials, since the choice shapes how the rest of the tooling is used. High-speed steel (HSS) comes as plain rectangular blanks that the operator grinds to shape on a bench grinder — a skill worth learning, because it lets the maker produce exactly the tool a job needs (an odd radius, a form tool, a special threading point) for the cost of a blank, and because a keen freshly-ground HSS edge gives an excellent finish and cuts happily at the modest speeds and light cuts a bench lathe takes. HSS is forgiving of the flex and interrupted cuts a small machine produces. Indexable carbide tooling, by contrast, carries a replaceable insert with several cutting edges: it holds its edge far longer, cuts hardened and abrasive materials HSS struggles with, and needs no grinding, but it costs more per edge, prefers higher speeds and more rigidity than a mini lathe always offers, and chips if abused. Most owners settle on carbide for roughing and tougher metals and ground HSS for fine finishing and special forms — and a shelf of pre-set QCTP holders lets both live side by side, ready to swap.
3.7 Knurling, collets, and steadies
A few further accessories round out what the machine can do. A knurling tool presses hardened wheels against the rotating work to roll (not cut) a raised diamond or straight pattern into its surface — the grippable texture on a knob or a thumb-screw. Because it forms rather than cuts, knurling puts real load on the machine, and the mini lathe’s low-end torque is again what makes it practical; a scissors- or clamp-type knurler that squeezes the work between opposed wheels is easier on a small machine than a single-wheel type that pushes the work sideways.
Collets are precision split sleeves that grip a single size of round stock over their whole circumference, running truer and marking the work less than chuck jaws. Fitted to the spindle (through a collet chuck or an MT3 closer), a set of collets is the accurate way to hold small drill-rod and bar for delicate work, and the choice for repeated parts that must run concentric. Finally, for long, slender work that would flex away from the tool, a steady rest clamps to the bed and cradles the work at a fixed point on adjustable fingers, while a follower rest rides with the carriage to back up the work right at the cut — both letting the machine turn parts far more slender than the tailstock alone could support without whip or chatter.
A last, easily-overlooked category is measuring tools, which belong on this list because a lathe can only be as accurate as the instruments that check its output. A part turned to a beautiful finish is worthless if it is the wrong size, and the machine gives the operator no way to know a diameter except by measuring it. A good caliper covers most work; a micrometer is needed where a fit must be held to a thousandth or better, as it must for a bearing seat or a press fit; a dial test indicator is what dials in a four-jaw chuck and checks tailstock alignment; and simple thread and radius gauges confirm that a threading tool or a formed radius is right. Measuring tools are as much a part of the lathe’s tooling as the chucks and cutters, and skimping on them undoes the accuracy the machine is capable of.
3.8 The tailstock end: drilling and reaming
The tailstock is not only a support; it is a drilling station, and its tooling reflects that. A Morse-taper drill chuck — a keyed or keyless chuck on an MT2 arbor — drops into the tailstock quill and holds straight-shank twist drills, so the operator can drill a hole precisely on the work’s axis by spinning the work and winding the quill forward. Larger drills with their own Morse-taper shanks go directly into the quill. Center drills (combined drill-and-countersink bits) are used first to start an accurate center hole — both to begin a drilled hole truly and to produce the 60-degree center that a tailstock center will later support. Reamers, likewise held in the tailstock, finish a drilled hole to an exact size and good finish. Because everything in the tailstock feeds along the spindle axis, this is how accurately-located and accurately-sized holes are put into the ends of turned parts.
3.9 A note on common LMS accessories
LittleMachineShop, being the machine’s vendor, catalogs a deep range of accessories built specifically to fit the 7×16, and a maker will accumulate them as the work demands. Beyond the four-jaw chuck, live center, and drill chuck already discussed, the commonly-added items include: a set of soft or larger chuck jaws and a set of solid collets (with a backplate or closer) for gripping small round stock accurately and gently; steady and follower rests to support long, slender work against tool pressure where the tailstock alone cannot; additional change gears to extend the range of threads the machine can cut in both imperial and metric; a quick-change tool post holder set beyond the five supplied, so more tools can live pre-set; a carriage stop for repeatable shoulder lengths; and consumables such as HSS blanks, carbide inserts, and cutting fluid. The practical guidance is the same one every mini-lathe owner arrives at: buy the machine, then budget again for tooling, because it is the tooling — the chucks that hold the work, the QCTP holders that hold the tools, and the tailstock accessories that put holes where they belong — that turns the 7×16 from a spinning spindle into a machine that makes parts.
Comments (0)