Nomad 3 · Volume 4
Nomad 3 — Projects, Specifications, and Reference
4.1 What the machine is for, shown in parts
The best way to understand a desktop mill is to look at the parts it produces, because the parts define the machine far better than the spec sheet does. Everything below is squarely within the Nomad 3’s envelope — small, precise, and mostly in aluminium or plastic — and each one leans on a capability covered in the earlier volumes: the rigidity that lets it cut metal, the probing that makes setup repeatable, and the enclosure that keeps the process clean.
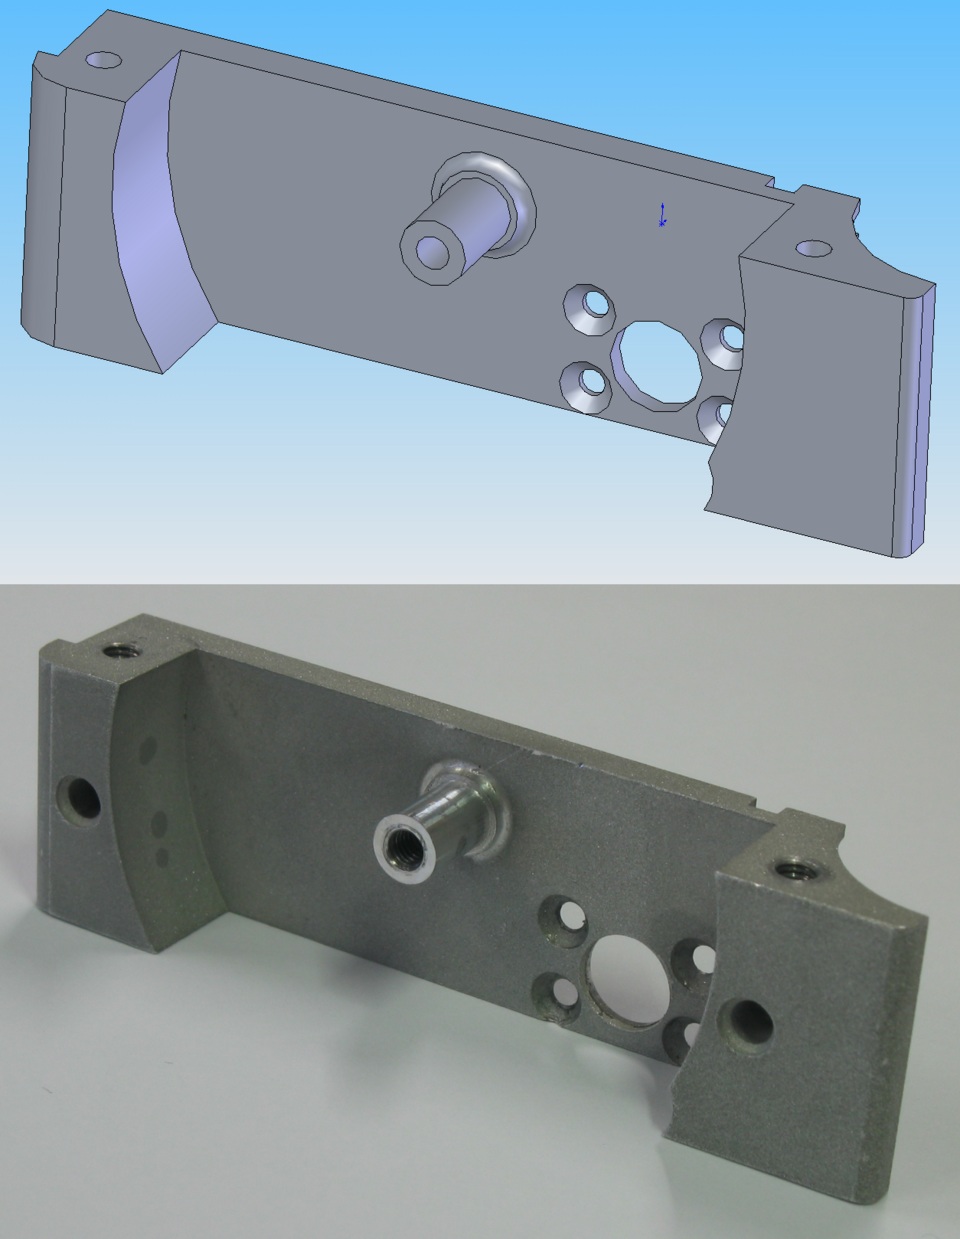
Aluminium brackets and mechanical parts. The signature Nomad project is a small structural part in 6061 aluminium: a motor mount, an L-bracket, a spacer, a lever, an adapter plate. These are parts where a printed plastic version would flex or creep and a hand-filed one would never be square. Drawn in CAD, pocketed and profiled with a 1/8-inch endmill in shallow passes, held in a vise, and probed off a corner, a bracket like this comes off the machine to a tolerance that bolts up right the first time.
Electronics enclosures and panels. Milling a clean rectangular pocket into a block of aluminium, or cutting precise cutouts, mounting holes, and connector openings into a panel, is a natural fit. A machined enclosure or faceplate has a fit and finish that a drilled-and-filed one cannot match, and the enclosure keeps the fine swarf off the bench. Engraved labels can be cut into the same panel in a second tool operation without re-zeroing, thanks to the automatic tool-length probe.
PCBs. Isolation-milling a circuit board — cutting away the copper around the traces of a single- or double-sided board — turns a Gerber file into a physical prototype board in an evening. Carbide Copper generates the toolpaths, the BitZero finds the board corner, and the enclosure contains the conductive copper dust. For an EE, this collapses the prototype-board turnaround from a shipping cycle to an afternoon.
Jewelry, engraving, and small 3D work. Wax and soft-metal jewelry blanks, engraved plates, name badges, medallions, and small sculpted reliefs use the machine’s precision and its 3D CAM. These are the parts that show off surface finish, where the spindle’s true running under the ER-11 collet pays off directly.
Plastics. Machined gears, jigs, knobs, standoffs, and custom fittings in Delrin, acrylic, HDPE, polycarbonate, or PEEK cut quickly and cleanly, and are often the fastest way to a precise functional plastic part that a 3D printer would render fuzzy or weak in the wrong direction.
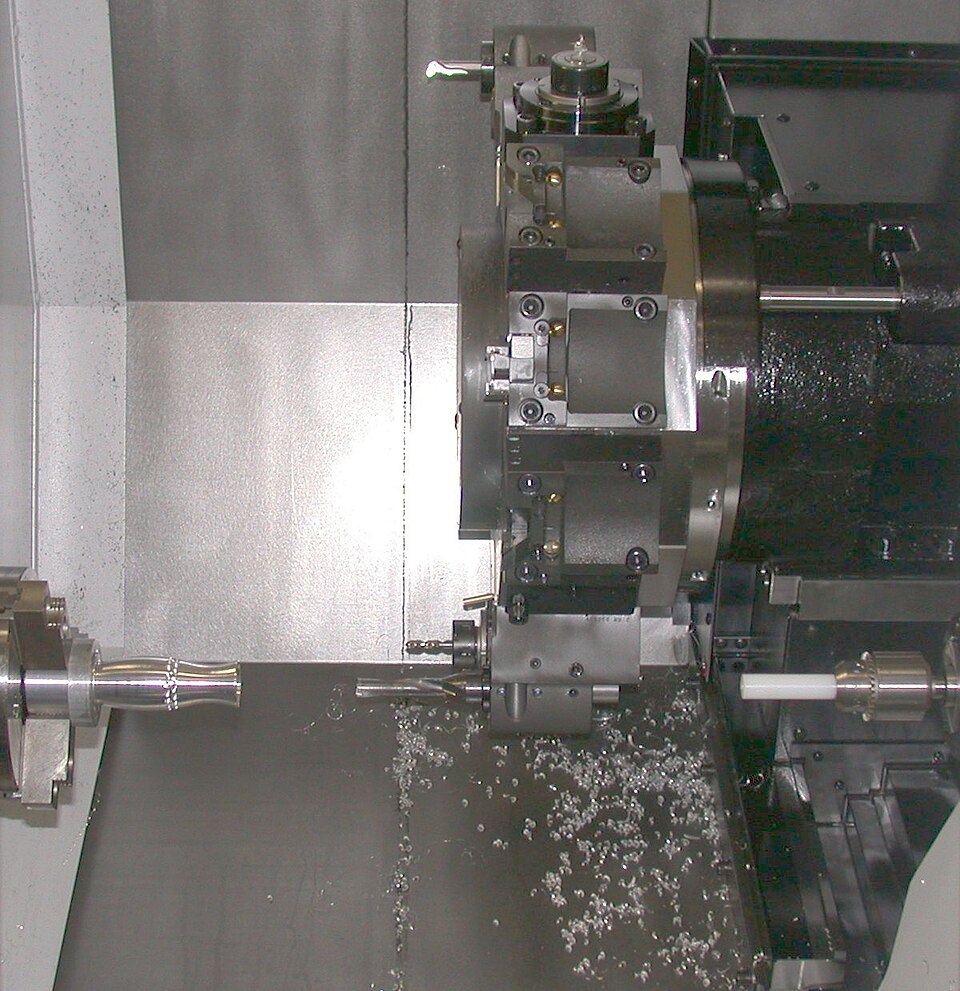
The common thread is small and precise in a harder material than a printer or a router handles well. Anything that is big and flat and made of wood belongs on the shop’s open router; anything that is palm-sized and needs to be right belongs on the Nomad.
4.2 A representative job, start to finish
It helps to walk one part through the whole process, because it ties together the machine, the software, and the setup discipline that the earlier volumes covered separately. Consider a simple but real job: an aluminium mounting bracket, roughly 60 by 40 mm, cut from 6 mm 6061 plate, with a rectangular pocket, four mounting holes, and a profiled outline.
The work starts in Carbide Create. The bracket outline, the pocket boundary, and the four hole centres are drawn to exact dimensions — or imported as a DXF from an upstream CAD package. Each feature then gets a toolpath: a pocket toolpath to clear the recess with a 1/8-inch flat endmill, a drill or a small helical contour for the holes, and a contour toolpath around the outline to cut the bracket free. The outline toolpath gets a few tabs so the finished part does not break loose on the last pass. Feeds and speeds come from the aluminium tool library — a moderate RPM, a modest feed, and a shallow depth per pass, so the 6 mm profile is cut in several passes rather than one. A quick look at the simulation confirms nothing plunges where it should not.
At the machine, the aluminium plate is held in the vise (or taped to the wasteboard if it is thin and the cut is light). The operator homes the machine in Carbide Motion, then runs the BitZero routine to find the plate’s corner and top surface — that sets the work zero, the origin the whole program is measured from. Loading the first tool, the machine runs its automatic tool-length probe so it knows exactly where the tool tip sits. Air (and a little mist or a touch of cutting lubricant on the tool) is set up to keep chips clear of the flutes.
Then the job runs. The operator watches and listens through the enclosure window: crisp chips and a steady cutting note mean the feeds and speeds are right; a squeal or fine powder would mean stopping to correct. If the program calls for a second tool — say a smaller finishing endmill — the machine pauses and prompts, the operator swaps the tool, the machine re-probes its length automatically, and cutting resumes at the correct depth. When the profile finishes, the bracket is held to the stock only by its tabs; a few strokes of a file or a snap frees it. Total hands-on time is a handful of minutes at each end, with the machine working unattended in between, inside a closed box that keeps the chips off the bench.
That loop — draw, assign toolpaths, probe, cut, watch, tool-change, free the part — is the same for nearly everything the Nomad makes. Only the geometry and the material change.
4.3 Specifications summary
The table below collects the Nomad 3’s key figures, verified against Carbide 3D’s published product specifications. Where a value is commonly cited but not the headline spec, it is noted as approximate.
Table 1 — Specifications summary
| Item | Specification |
|---|---|
| Machine type | Fully enclosed 3-axis desktop CNC mill |
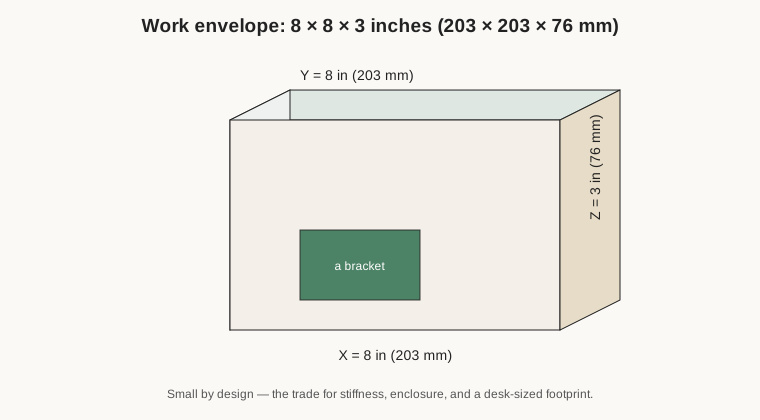
| Cutting / work area | 8 in (X) × 8 in (Y) × 3 in (Z) — approx. 203 × 203 × 76 mm |
| Machine footprint | approx. 17.5 in (X) × 19 in (Y) × 17 in (Z) |
| Weight | approx. 65 lb (approx. 29 kg) |
| Spindle | Brushless DC, approx. 130 W |
| Spindle speed | 9,000 – 24,000 RPM |
| Tool holding | ER-11 collet, up to 7 mm (approx. 1/4 in) shank |
| X / Y guides | 20 mm linear rails |
| Z guide | Profile linear rail (HG15-class) |
| Lead screws | With anti-backlash nuts |
| Homing | Inductive (non-contact) switches |
| Tool-length probe | Fixed automatic probe (measures every tool) |
| Work probe | BitZero V2 (XYZ corner + surface, included) |
| Enclosure | Sealed HDPE or bamboo, clear interlocked door, interior lighting |
| Wasteboard | MDF (included); accessory threaded/fixture plate available |
| Materials | Woods; plastics (ABS, acrylic, PC, Delrin, HDPE, PEEK, PVC); metals (aluminium, brass, copper); copper-clad PCB. Steel only for very light work |
| Controller | GRBL-family motion controller, USB |
| Software (included) | Carbide Motion (sender), Carbide Create (2D CAD/CAM), MeshCAM (3D CAM), Carbide Copper (PCB); Alibre Workshop CAD (Windows) |
| Power | 110 / 220 V, approx. 2 A |
| Host OS | Windows 11 or macOS 15 (or higher) |
The two numbers a prospective owner should internalise are the 8-inch work area (this is a small-parts machine) and the 9,000–24,000 RPM / 130 W spindle (moderate power, but a speed range low enough to cut aluminium sensibly). Together they define both the promise and the limits of the machine.
4.4 Maintenance
A desktop mill is a precision machine, and it stays precise only if it is kept clean and lubricated. None of this is onerous — it is a few minutes of habit — but skipping it is how a machine slowly loses accuracy.
- Clean out chips after every job. Open the door, vacuum the tray, and brush chips off the axes and out of the corners. Aluminium and PCB dust are abrasive; letting them pack around the rails and screws is the fastest way to wear the motion system. The enclosure makes this easy — the mess is all in one box.
- Keep the linear rails and lead screws lightly lubricated. Wipe the rails clean and apply the manufacturer-recommended light machine oil or grease to the guides and screws on a regular schedule. Dry rails wear faster and move less smoothly; over-oiled rails just collect grit, so light and clean is the goal.
- Watch the collet and spindle. Keep the ER-11 collet and nut clean and free of chips before every tool change — grit in the collet ruins concentricity and grip. Inspect the collet for wear and replace it if a tool no longer runs true. Do not overtighten; snug and clean beats brute force.
- Check that workholding hardware stays true. Clean the vise and fixture plate, keep threads clear, and re-flatten or replace the MDF wasteboard once it gets chewed up, since a flat reference surface is the foundation of an accurate setup.
- Re-home and trust the probes. After maintenance, home the machine and let the tool-length probe and BitZero re-establish the references rather than assuming the old zeros still hold. The probing exists precisely so the operator never has to trust a remembered position.
- Replace consumable tooling on time. A dull endmill cuts badly, rubs instead of cutting, generates heat, and can grab — swap endmills when the finish degrades or the sound changes, rather than pushing a worn tool to failure.
Keep tools sharp, rails clean and oiled, the collet spotless, and the enclosure vacuumed, and a Nomad holds its accuracy for years of hobby use.
4.5 Safety and good habits
A desktop mill is far safer than an open router or a manual machine — the interlocked enclosure means the spinning tool is not exposed while it runs — but it is still a machine that turns a carbide cutter at thousands of RPM and throws sharp metal chips, and it deserves respect.
- Let the enclosure do its job. Run with the door closed. The interlock exists so the spindle is contained; defeating it removes the machine’s single biggest safety feature and lets chips escape into the room.
- Chips are sharp and hot. Machined aluminium and steel chips are like small blades and can be hot straight off the cutter. Brush and vacuum them, never wipe them up with a bare hand, and wear eye protection when the door is open for setup or cleanup.
- Secure the work, every time. The most common way to break a tool or launch a part is inadequate workholding. Confirm the stock cannot move before starting, and keep hands clear during probing and cutting.
- Mind the tooling. Small endmills are brittle and snap without warning if overloaded; handle them carefully, keep the collet clean, and do not run a visibly dull or chipped tool. Stop the spindle fully before any tool change.
- Manage dust from the right materials. Aluminium and PCB dust are abrasive and conductive; some plastics and woods produce fine dust worth extracting. Vacuum the enclosure and, for dusty jobs, run a shop vacuum at the machine.
- Know where the stop is. Keep the feed-hold and emergency stop within reach and use them the instant a cut sounds or looks wrong, rather than hoping it recovers. Stopping early costs a restart; not stopping costs a tool, a part, or worse.
None of this is burdensome — with the door closed and the work clamped, a Nomad is about as benign as a metal-cutting machine gets — but the habits are what keep it that way over years of use.
4.6 Further reading and reference
The Nomad benefits from an unusually good documentation and community ecosystem, which is worth leaning on — most questions a new owner has are already answered somewhere below.
- Carbide 3D product and specification pages —
carbide3d.com/nomad/and the shop product page. The authoritative source for current specs, what is in the box, and material capabilities. - Carbide 3D documentation hub —
carbide3d.com/hub/. Setup guides, the Getting Started guide, ER-collet basics, probing (BitZero) instructions, and tooling references. - Carbide 3D community forum —
community.carbide3d.com. The most valuable single resource for real-world use: tested feeds-and-speeds charts for aluminium and other materials, workholding ideas, troubleshooting threads, and project galleries. Search here before asking; the answer usually already exists. - Feeds-and-speeds recipes and material charts — Carbide’s own aluminium recipes plus the community’s shared charts (including the long-running “Shapeoko & Nomad — Feeds & Speeds Charts” threads) are the fastest route to numbers that work on this specific machine.
- Software help — Carbide Create, MeshCAM, and Carbide Copper each have their own tutorials and documentation via the Carbide hub; the Carbide 3D YouTube channel’s tutorial and #MaterialMonday videos walk through real cuts, including aluminium recipes for the Nomad.
A final word on where the Nomad fits alongside the shop’s other machines is worth restating, because it is the key to getting value from any one of them. The open router handles the big and the soft: sheet goods, wood, signs, large flat work. The 3D printer handles complex plastic geometry and hollow shapes where strength in every direction does not matter. The Nomad handles the small, dense, and precise: metal brackets, machined enclosures, PCBs, jewelry, and functional plastic parts that need to be right. Each machine is unremarkable at the others’ jobs and excellent at its own, and the shop works best when every part is routed to the machine actually built for it. The Nomad’s contribution to that division of labour is the whole world of small precision metalwork that would otherwise be out of reach on a hobby bench.
For this shop, then, the Nomad 3’s role is settled and specific: it is the quiet, clean, precise machine for small metal, plastic, and PCB parts that the open router was never the right tool for. Kept clean and fed sensible feeds and speeds, it turns the idea of “I’ll just machine that out of aluminium” from an ambition into an ordinary afternoon.
Comments (0)