CNC Coil Winder 2 · Volume 1
CNC Coil Winder 2 — Overview: a second programmable winder for the bench
1.1 Why a shop ends up with a second winder
A coil winding machine does one deceptively simple thing: it turns a bobbin a precise number of times while laying wire onto it evenly. The difficulty is in the word precise. A finished coil is only as good as the turn count, the spacing between turns, and the tension the wire was laid under — and those three variables pull in different directions depending on what is being wound. A hair-fine 0.05 mm winding for an RF choke wants delicate tension and thousands of tightly stacked turns; a heavier 0.8 mm power-transformer primary wants firm tension, a wider bobbin, and a traverse that steps a much larger distance per turn. One machine can be re-set for both, but re-threading a tensioner, swapping arbors, and re-entering a program every time the job changes is exactly the friction a working shop tries to design out.
That is the reasoning behind the machine documented here. It is this shop’s second CNC coil winder — a distinct unit, bought separately through an eBay listing (item 406920548529), that sits alongside an existing CNC winder (winder 1) and a homemade winder built in-house. This volume introduces what the machine is, where it came from, and how it fits into a bench that already had winding capability. The later volumes go deep on the mechanism (Volume 2), on actually running a wind (Volume 3), and on specifications, maintenance, and reference links (Volume 4).
A note on scope before going further: the point of a second commercial winder is not redundancy. It is specialization. Two winders let the shop keep two standing setups — one dressed for fine wire and small formers, the other dressed for medium and heavy wire and wider bobbins — so that most jobs can start immediately on whichever machine is already configured for that class of coil. The homemade winder covers the odd, one-off, or oversized job that neither commercial unit handles cleanly. Where this volume talks about “which winder for which job,” that is the intent: complementary capacity, not a spare.
1.2 What this machine is
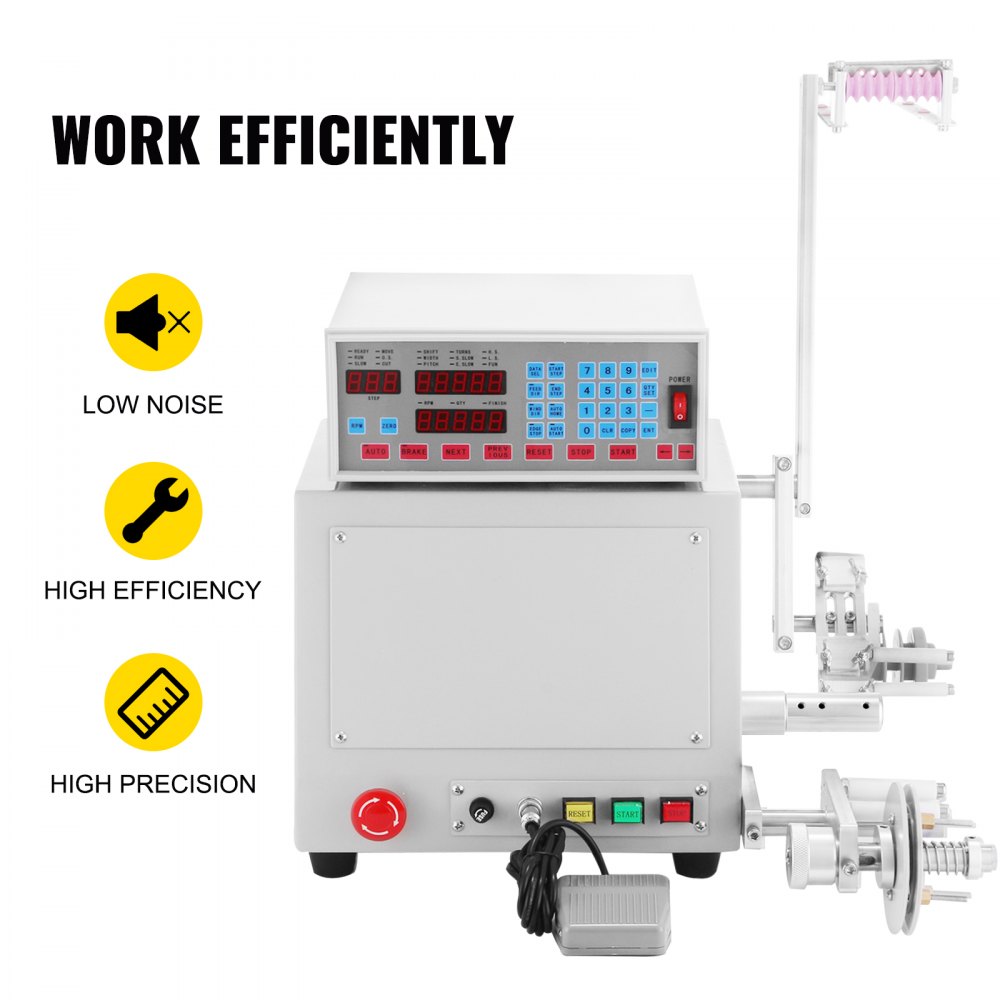
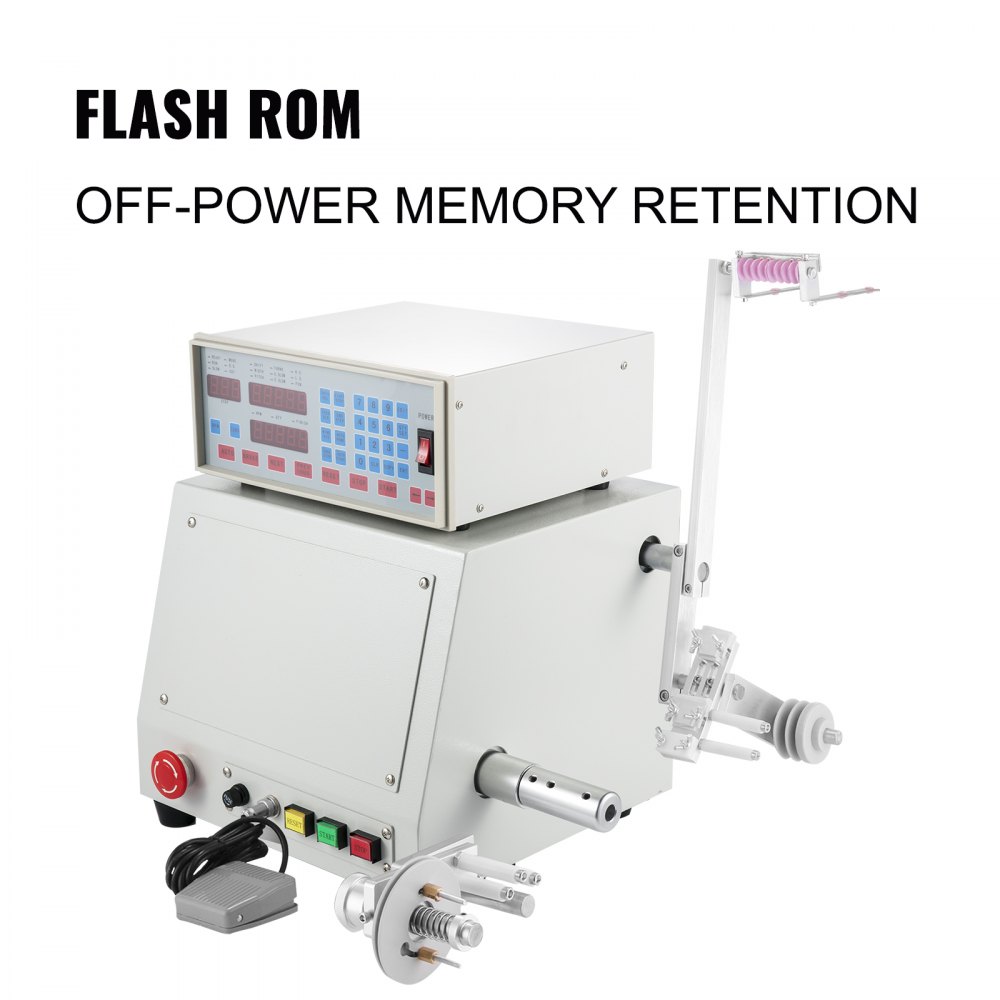
The listing that this unit came from is one of a very large family of imported benchtop CNC coil winders sold under many labels — VEVOR, MXBAOHENG, Happybuy, Gowe, SVOPES and others — all built around the same mechanical layout and the same class of programmable controller. eBay item numbers for these machines rotate constantly as sellers relist, and the specific listing text for 406920548529 was not reachable at the time of writing, so the description here is drawn from the identical machine class rather than invented for this one unit. The owner’s exact plate values are left as slots to be filled from the machine itself.
Mechanically the machine is a single cast or heavy-sheet-steel base carrying three coordinated pieces of motion hardware and one controller:
- A spindle at one end, driven by a brushless DC motor, capable of a claimed top speed around 6000 rpm. The spindle carries the bobbin or former and is what the turn counter actually counts.
- A traverse carriage — a wire guide riding on a leadscrew driven by a stepper motor — that moves parallel to the spindle axis and lays each turn of wire down beside the last.
- A tensioner and wire path (on many units a felt-disc or spring tensioner, with a dereeler/supply spool position) that keeps the incoming magnet wire under steady, adjustable pull.
- A CNC controller — on this class typically a Minsu-Automation CNC-200A or a close equivalent — with a keypad and multi-window digital display that stores the winding program and drives both motors.
The headline capability numbers for this class, which the owner should confirm against the unit’s own label, are a windable wire diameter of roughly 0.03 to 1.2 mm (some large-torque variants extend to 2.0 mm), a maximum winding width of about 108 mm, a maximum former/framework diameter of about 200 mm, and program memory for on the order of a thousand winding steps organised into stored groups. Turn counting resolves to a tenth of a turn. Power is single-phase mains; the spindle motor on the common 400 W version draws a few hundred watts, with 600-750 W “large torque” versions available for the heavier-wire, wider-bobbin end of the range.
None of that makes it a production machine in the industrial sense — it has no automatic wire cutting, no shuttle for toroids, and no closed-loop tension servo. It is a programmable bench winder: it automates the two things a human is worst at doing repeatably by hand, namely counting turns exactly and spacing them evenly, and it leaves the setup, threading, and finishing to the operator. For a model shop that is precisely the right amount of automation.
1.3 Where it fits: matching the job to the machine
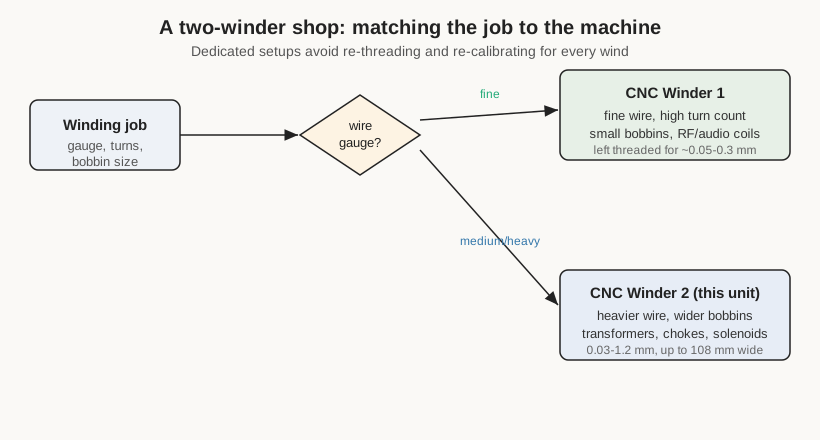
The value of running two commercial winders comes down to keeping standing setups. Threading a fine-wire tensioner correctly, dialling in a few tens of grams of tension, and confirming the traverse pitch against the wire is fiddly, delicate work; nobody wants to tear it down to run a quick heavy-gauge choke and then rebuild it. So the natural division in a two-winder shop is by wire gauge and bobbin size, because those two variables determine almost everything else about the setup.
In broad terms, the fine end of the shop’s work — small RF and audio coils, sensor and pickup windings, low-current signal transformers, anything with a high turn count on a small former — lives on the machine kept threaded for fine wire (here, winder 1). The medium and heavy end — power-transformer windings, filter chokes, solenoid and relay coils, motor and actuator coils, anything on a wide bobbin or in thicker wire — is the natural home for this machine, winder 2, whose 108 mm width and 1.2 mm wire ceiling suit it to bigger, coarser coils. This is a tendency, not a rule; both machines can be re-set across much of the range. But keeping each one dressed for its half of the work is what turns two winders into a genuine throughput gain rather than two copies of the same tool.
Because this is a distinct machine and not a clone of winder 1, its own details matter and are documented in their own right in the following volumes rather than by reference to the other unit. The two machines share a class — same controller family, same basic spindle-plus-traverse architecture — so an operator fluent on one is immediately productive on the other, but their standing configurations, arbors, and tensioner settings are deliberately different. Where the two overlap in capability, the tie-breaker is simply which one is already threaded for the job at hand.
There is also a practical, non-technical reason a shop accumulates winders: they turn up. These imported CNC winders appear on the used market steadily, often from small manufacturers upgrading, from failed ventures, or from hobbyists who bought more machine than they needed, and they can be had for a fraction of new. That is how this unit arrived — a separate eBay purchase, not a planned matched pair with winder 1. Buying used carries the usual caveats (voltage set for the seller’s region, possibly missing accessories, unknown wear on the wire-path surfaces), all of which are worth checking on receipt and are covered in the reference volume. But the economics are what make a two-winder bench reasonable in the first place: the second machine costs little enough that dedicating it to a gauge band, rather than pressing it into service as a spare, is an easy call.
1.4 The third winder, and why commercial units earn their keep
For completeness it is worth placing this machine against the shop’s homemade CNC coil winder as well, since the three form one capability rather than three separate tools. A shop-built winder — typically a microcontroller or CNC-driven spindle and a leadscrew traverse assembled from stepper motors, a small controller board, and a printed or machined frame — is enormously flexible and can be sized for jobs no benchtop commercial unit handles: an unusually long former, an oversized spool, a bespoke tensioner, or an experimental winding pattern coded directly into firmware. What it does not offer, out of the box, is the polished, repeatable, battery-free program memory and the refined soft-start/soft-stop behaviour of a mature commercial controller like the CNC-200A. So the natural division extends to three: the two commercial winders take the bread-and-butter fine and heavy work quickly and repeatably from stored programs, and the homemade machine takes the outliers and the experiments. This machine, winder 2, is the heavy-and-wide member of that trio.
1.5 What a wind actually is (and where the theory lives)
For a reader coming to coil winding fresh, it is worth grounding a few terms that recur throughout these volumes, because the machine’s controls map directly onto them.
A turn (or “circle,” in the controller’s own vocabulary) is one full revolution of the spindle, which lays one loop of wire onto the former. Turns count is simply how many of those the controller will execute before it stops — the single most important number in any winding, since inductance for a given geometry scales with the square of the turn count. Pitch is the distance the traverse advances along the axis for each turn; for a normal close-wound layer the pitch is set equal to the wire’s overall diameter so that consecutive turns sit shoulder to shoulder with no gaps. Winding width is the axial span the traverse sweeps before it reverses to begin the next layer; a coil is built up as a stack of layers. Tension is the steady pull the wire is held under as it is laid, which controls how tightly and how uniformly the turns pack and whether fine wire survives the process without stretching or breaking. Taps are intermediate connection points brought out partway through a winding, made by pausing the wind and leaving a loop or lead.
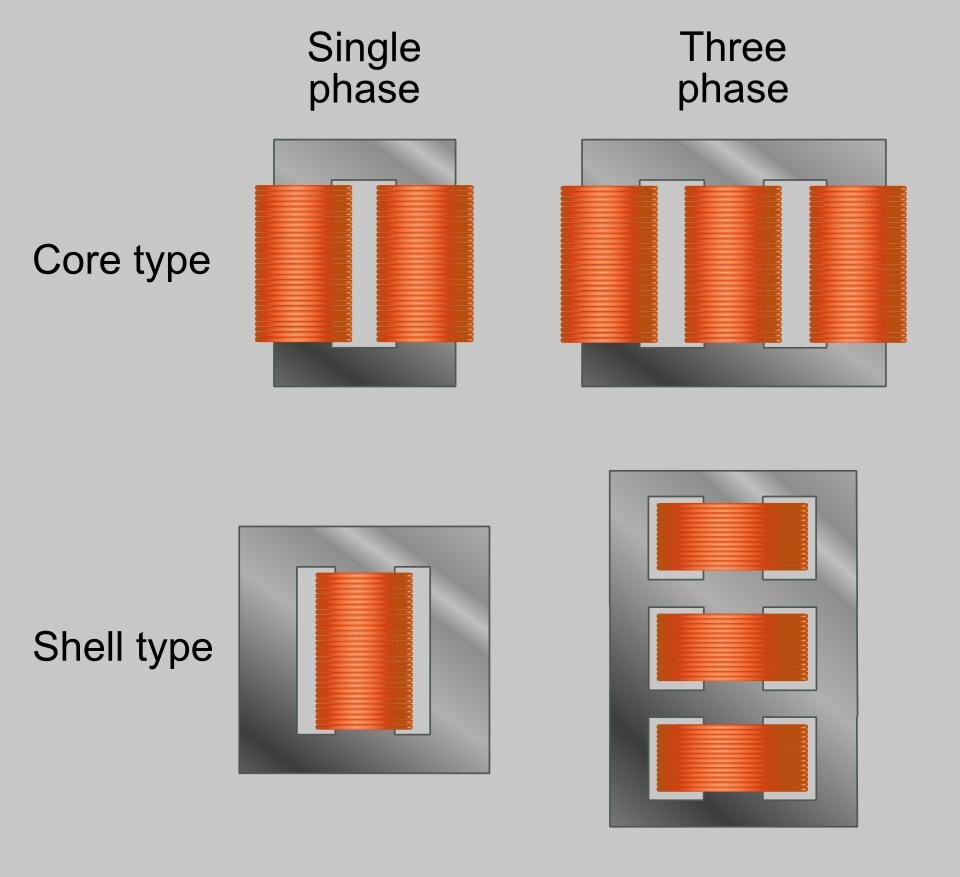
Those terms — turns, pitch, tension, layers, taps, plus the electromagnetic reasoning behind why a coil is wound the way it is — are the subject of two dedicated reference dives elsewhere in the collection, and this machine’s documentation is written to sit alongside them rather than restate them. The “Coils and coil winding” reference dive covers the physics and practice of the coil itself: inductance, turn count, wire gauge selection, layering, close versus spaced winding, and measurement of the finished part. The coming “Transformers and transformer winding” reference dive covers the multi-winding case: primaries and secondaries, turns ratios, interleaving and insulation between windings, taps, and the winding-order conventions that make a transformer behave. Readers who want the why behind a number entered into this machine’s keypad should reach for those dives; this set of volumes concentrates on the how of the specific machine — what its controls do, how to set it up, and how to run it well.
One more distinction is worth drawing early, because it shapes how the machine is used: this is a layer/linear winder, not a toroid or figure-eight winder. It winds onto a former or bobbin held on a rotating spindle, building up cylindrical layers. It cannot thread wire through the hole of a closed toroidal core — that needs a shuttle winder of an entirely different design. So when the shop’s work calls for a toroid, it is wound by hand or on dedicated tooling, not on this machine; what this machine excels at is the bobbin-and-former case that covers the great majority of transformers, inductors, chokes, solenoids, and pickup-style coils.
That cross-reference runs both ways. The reference dives’ descriptions of a modern programmable winder are illustrated in part by this shop’s machines, and this machine’s owner’s-build slots — the photographs of the actual unit in service, the real programs run on it, the coils it has produced — are the concrete examples those more theoretical dives point back to. Volume 2 now takes the machine apart subsystem by subsystem.